B. APDRS
06/15/2018
* DO NOT use the forward/backward buttons on your browser in APDRS. The information will be unsynchronized. **
The APD Receipting Solution (APDRS) is a web-based interface developed to replace the paper process. APDRS is internet based and accessible via an Internet Explorer secure link: https://obiapps.dhs.sdc.pvt/APDRS/.
Permission from the Office of Business Intelligence must be granted to access APDRS. Managers must request rights for staff members.
All monies received by AAA/APD field offices and by the Office of Financial Services (OFS), including the centralized lockbox and online credit card website, will be receipted into the APDRS system.
- Note: All monies receipted statewide in APDRS will be visible to all system users.
A user manual for APDRS is located on the APDRS home page under Links.
A PowerPoint with screen prints is also available.
Online training for APDRS is available via iLearn:
https://ilearn.oregon.gov/ContentDetails.aspx?id=A6364F8C6CBD44F199CBAFC318605AD2
There are four (4) roles in the APD Receipting Solution (APDRS) with separate rights and functions. Roles are determined by individual job function.
Staff: The role of staff has two options; view-only or receipting. A limited number of staff will be able to add deposits to APDRS and edit unlocked deposits. They will also can print receipts. View-only staff will have rights to view activity in APDRS only.
- Authorization for staff roles may be granted by either manger or admin roles.
Manager: The role of manager can perform all the functions of the staff roles. Managers can unlock and void deposits or receipts. It is the manager’s role to authorize workers to have the receipting staff role.
- Authorization for manager roles may be granted by admin roles.
OFS receipting: This role is restricted to the Office of Financial Services in Central Office. OFS receipting can create deposits independent of branches and can import or export data.
Admin: The role of admin grants and set-ups toles for all other users. Admin is the highest level of permissions and encompasses all the other roles.
- To request additions or deletion of permissions in APDRS, email APDRS.UserRequest@dhsoha.state.or.us.
Records can be located by clicking Receipts then selecting List Receipt or by clicking Deposits.
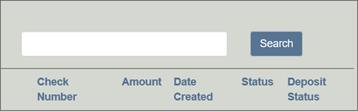 |
Receipts: Shows information about payments receipted into APDRS. Locate a record by entering a search term in the Search field.
Potential search/filter terms include:
-
Branch number - example: 0311;
-
Branch name - example: Albany;
-
Prime number;
-
Case number;
-
Date of receipt - this will return every receipt for that date across the state;
-
Check number; or
- Receipt number.
Results may be sorted alphabetically/low to high by clicking on the column header.
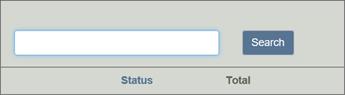 |
Deposits: Shows the receipts exported to the APDRS system. Locate a record by entering a search term in the Search field.
Potential search/filter terms include:
-
Branch number - example: 0311;
-
Branch name - example: Albany;
-
Deposit number; or
- Date of deposit - this will return every receipt for that date across the state.
All receipting will now be done through the APD Receipting Solution (APDRS); please disregard prior information and training in favor of APDRS procedures.
- Note: Only staff with specific rights/role will be able to add or edit receipts/deposits.
Adding a new receipt:To add a receipt, in other words a record of funds received, to the APDRS:
-
Click Receipts at the top of the screen and select New Receipts;
-
Choose the Receipt Branch where the payment was received – this may not be the same as the branch where the case is held;
-
Enter the Prime number of the person who receives services. The case number list will be auto-populated;
-
Select the correct case number. The case name, program, and load code will be auto-populated;
-
The Receipt Code will autofill for the correct program;
- Note: Verify the program selected is correct. If the code is not correct, choose another code from the drop-down.
-
Select the payment type. If Check is selected, also enter the check number;
-
Enter the name of the person or the entity making the payment in Received From.
- If the payment is from a provider, check the Provider? box and enter the provider information in the new window and click Save;
-
Enter a description for this payment – the month is no longer needed in the descriptions.
-
Click Save at the bottom of the page;
-
The receipt will default to an open status for your review;
-
Select Print and Lock Receipt at the bottom left to finish process.
- Note: It is not necessary to print the receipt to lock it.
All receipting will now be done through the APD Receipting Solution (APDRS); please disregard prior information and training in favor of APDRS procedures.
- Note: Only staff with specific rights/role will be able to add or edit receipts/deposits.
Add new deposit: To add a deposit to the APDRS:
-
Click Deposits at the top of the screen and select New Deposit;
-
Choose the Receipt Branch where the payment was received – this may not be the same as the branch where the case is held;
-
Enter the Deposit Number;
-
Optional: Enter the date the funds were taken to the bank in the Date Deposited field;
- Click the Create button at the bottom of the page.
To add a receipt to the total deposit, first locate the desired deposit:
-
Receipts which are available to be added to this deposit appear in the lower section under Open Receipts;
-
To be available to be added to deposit, a receipt must:
- Have a status of locked;
- Matches the branch of the deposit;
-
Not be part of another deposit.
-
Click the Add button next to each receipt under Open Receipts to move payments to the deposit;
- Note: Review each receipt for accuracy before adding it to the deposit.
- When the deposit is finished, click Lock.
Payments added to the deposit in error may be removed by clicking the Remove button next to the receipt.
- Removed deposits will be placed back in the Open Receipts section.
Completed deposits must be reviewed by a manager.
-
Click Deposits at the top of the screen and select New Deposit;
-
Choose List Deposits and locate the deposit for review;
-
Verify the total deposit in APDRS matches the bank deposit slip;
-
Verify the SFMU deposit screen matches the total of all CEP/in-home receipts in the deposit;
- Once verified, on the Open Deposit screen, click Lock.
Code |
Description |
113 |
Repayment of past assistance for deceased consumers. This is for money from the consumer’s accounts, sale of home, etc. |
121 |
Reimbursement of past assistance, consumer over resources, LTC (Long Term Care) insurance; these are the main ones. Same receipt requirements as 113. |
172 |
ICP tax refunds/returns of overpayments/Independent Choices Program |
181 |
EPD: Employed People with Disabilities payment |
308 |
Elderplace/PACE. These are monthly pay-ins by the consumers to receive Elderplace services. |
317 |
Trust and Agency. Benefits (monies) received on the consumer’s behalf, usually from Social Security, pensions, or royalties. Receipt requirements: Date received, program #, branch #, case # (WCMI screen), consumer name, receipt code, deposit #, description, amount, and special and/or maintenance amount. The description cannot state the account type, such as T&A. The description should specify what the what the money if for or from: SSI, pension payment, pharmacy refund., |
526 |
Initial license and renewal fees for the Adult Foster Homes. |
999 |
To research those payments. |
CEP |
SFMU consumer pay-in payments |
PAY |
Initial month in-home care payment. Usually, the initial month of payment is not on the SFMU screen; please make sure. If the initial month payment does not appear, check with the worker to determine the consumer will start receiving bills on the next billing cycle. Use for any payments consumers make for monies owed which are not on the SFMU system for some reason (no billing processed for that month). Include the prime # in the Description field and the month the payment is for. |
216 |
Refund of assistance, a consumer returns money advanced to them for travel expenses. If possible, include the original issued check number in the description. Receipt requirements: Date received, program #, branch #, case # (WCMI screen), consumer name, receipt code, deposit #, description, and an amount. |